If you are developing applications based on the Django web framework for python, you know that for each of your model classes also a lot of other code has to be written: urls, views, forms, templates, navigation etc..
Maybe you have wondered if this could not be simplified. I present here code to create (or use generic variants of) all these items directly from the model classes in a fully automatic way. There might be serveral cases in which this could be useful:
- To create a simple CRUD web application in minutes (e.g. for temporary use)
- To create basic editing functionality for rarely edited configuration model classes quickly (if the django admin interface cannot be used for this)
- As a basis for a more sophisticated application with maximum code reuse
I will describe all the necessary step to create such a solution in detail in this blog post. You can also find the code for a complete demo application on my Github page (link on the bottom of this blog post).
Note that I kept my solution intentionally very minimalistic. It uses as much of the standard functionality of the Django framework as possible. It is also a conventional application (server side rendered html) and not a modern React frontend with REST/JSON-API backend. But for the intended purpose this will be often totally sufficient. And the ideas presented here can be used to create a more modern version.
First we need a base class for all model classes which should be handled in a generic way:
class GenericBase(models.Model):
    created_at = models.DateTimeField(auto_now_add=True)
    updated_at = models.DateTimeField(auto_now=True)

    HAS_VIEW_URL = False # generate no url to view the object by default (for list view)

    NAME = "Please overwrite the NAME property of all generic classes!"

    class Meta:
        abstract=True # Set this model as Abstract
Now we can define the model classes as subclasses of this GenericBase class:
class Author(GenericBase):

    NAME = "Author"

    name = models.CharField(max_length=100, verbose_name="First, second name")
    date_of_birth = models.DateField(verbose_name="Birth date")

    def __str__(self):
        return self.name
The NAME class variable should be set to a description of the class which is used for display. For each model class we also have to manually create a form, but this is extremely easy:
class AuthorForm(ModelForm):
    class Meta:
        model = Author
        exclude = ()
Important: use for the name of the forms always the class name + Form As usual, it is possible to exclude some form fields from beeing shown in the form (exclude property).
This is all we have to do now to create an app! All the rest is handled by the generic code (which never needs to be modified) I will explain in the following:
First we create a list of model classes in models.py which should be handled by the generic code. This list should contain all the classes which are (true) subclasses of GenericBase:
cls_members = inspect.getmembers(sys.modules[__name__], inspect.isclass)

GENERIC_CLASSES = []
for cls in cls_members:
    if issubclass(cls[1],GenericBase) and (not cls[1].__name__=='GenericBase'):
        GENERIC_CLASSES.append(cls[1])
Now we can create in the forms.py a similar list (of tuples) which also contains the forms:
GENERIC_CLASSES_AND_FORMS = []
for cl in GENERIC_CLASSES:
    form_cl = globals()[cl.__name__+"Form"]
    GENERIC_CLASSES_AND_FORMS.append((cl,form_cl))
Now we create the generic views. I describe the list view here as an example (the other views are very similar):
def get_navigation_links():
    return [ {'name': cl.NAME, 'url': cl.__name__.lower()+'-list'} for cl in GENERIC_CLASSES]

class GenericList(PermissionRequiredMixin,ListView):

    template_name = "generic_list.html"

    def dispatch(self, *args, **kwargs):
        self.model = self.kwargs.get('model','')
        self.model_name = self.model.__name__.lower()
        self.form_class = self.kwargs.get('form_class','')
        self.permission_required = 'stock.view_'+self.model_name
        self.success_url = reverse_lazy(self.model_name+"-list")

        return super(GenericList, self).dispatch(*args, **kwargs)

    def get_context_data(self, **kwargs):
        data = super(GenericList, self).get_context_data(**kwargs)
        data['NAME']=self.model.NAME
        data['AddURL']=self.model_name+"-add"
        data['UpdateURL']=self.model_name+"-update"
        data['DeleteURL']=self.model_name+"-delete"
        if hasattr(self.model, 'HAS_VIEW_URL') and self.model.HAS_VIEW_URL:
            data['ViewURL']=self.model_name+"-view"
        else:
            data['ViewURL']=False
        data['CanAdd']=self.request.user.has_perm('stock.add_'+self.model_name)
        data['CanEdit']=self.request.user.has_perm('stock.change_'+self.model_name)
        data['CanDelete']=self.request.user.has_perm('stock.delete_'+self.model_name)

        data['NAV_LINKS'] = get_navigation_links()
        return data
The dispatch method sets properties like permission_requred and success_url to standard values (which always use the class name of the model). Other properties (model and form_class) are set from parameters (i.e. we have to pass them to the view in the url definitions). get_context_data creates many variables in data which will be used in the generic templates.
The url definitions (with the parameters mentioned above) in urls.py are also created automatically:
for cl in GENERIC_CLASSES_AND_FORMS:
    class_name_lc = cl[0].__name__.lower()
    urlpatterns.append(
        path(class_name_lc+'/add', views.GenericCreate.as_view(),  {
            'model': cl[0],
            'form_class': cl[1],
        },
        name=class_name_lc+'-add')
    )
    urlpatterns.append(
        path(class_name_lc+'/', views.GenericList.as_view(),  {
            'model': cl[0]
        },
        name=class_name_lc+'-list')
    )
    urlpatterns.append(
        path(class_name_lc+'/<int:pk>', views.GenericUpdate.as_view(),  {
            'model': cl[0],
            'form_class': cl[1],
        },
        name=class_name_lc+'-update')
    )
    urlpatterns.append(
        path(class_name_lc+'/<int:pk>/delete', views.GenericDelete.as_view(),  {
            'model': cl[0]
        },
        name=class_name_lc+'-delete')
    )
    if  (not (hasattr(cl[0], 'HAS_CUSTOM_VIEW_URL') and cl[0].HAS_CUSTOM_VIEW_URL)) and (hasattr(cl[0], 'HAS_VIEW_URL') and cl[0].HAS_VIEW_URL):
        urlpatterns.append(
            path(class_name_lc+'/<int:pk>/view', views.GenericView.as_view(),  {
                'model': cl[0],
                'form_class': cl[1],
            },
            name=class_name_lc+'-view')
The only thing still missing now are the generic templates. Let's look at the list view template (generic_list.html) as an example:
{% extends "base.html" %}
{% block title %}{% endblock %}
{% block content %}

<script src="https://code.jquery.com/jquery-3.5.1.js"></script>
<script src="https://cdn.datatables.net/1.10.21/js/jquery.dataTables.min.js"></script>

    <h2>{{ NAME }}: </h2>
    <div>
        {% if CanAdd %}
        <p>
            <a href="{% url AddURL %}">[+]</a>
        </p>
        {% endif %}
      <table id="list" class="display" style="width:100%">
        <thead>
            <tr>
                <th>Item</th>
                {% if ViewURL %}<th>Show</th>{% endif %}
                {% if CanEdit %}<th>Edit</th>{% endif %}
                {% if CanDelete %}<th>Delete</th>{% endif %}
            </tr>
        </thead>
            {% for object in object_list %}
                <tr>
                  <td>{% if CanEdit %}<a href="{% url UpdateURL object.pk %}">{{ object }}</a>{% else %}{{ object }}{% endif %}
                  </td>
                  {% if ViewURL %}<td><a href="{% url ViewURL object.pk %}">view</a></td>{% endif %}
                  {% if CanEdit %}<td><a href="{% url UpdateURL object.pk %}">edit</a></td>{% endif %}
                  {% if CanDelete %}<td><a href="{% url DeleteURL object.pk %}">delete</a></td>{% endif %}
                </tr>
            {% empty %}
                <tr>No items yet</tr>
            {% endfor %}

        </table>
        {% if CanAdd %}
        <p>
            <a href="{% url AddURL %}">[+]</a>
        </p>
        {% endif %}
    </div>

    <script>
        $(document).ready(function() {
          $('#list').DataTable({order: [[ 1, "asc" ]] });
        } );
    </script>
{% endblock %}
I have included the datatables JavaScript, which adds a lot of functionality (pagination, search, sorting etc.) with minmal effort. For a not too large number of records this is a very simple, user friendly and fast solution.
Note that we can even generate the links in the main navigation automatically:
{% for link in NAV_LINKS %}
<a class="dropdown-item" href="{% url link.url %}">{{link.name}}</a>
{% endfor %}
The complete python code for the demo application is available for download on my Github page.
The code needs the django framework in version 5.0 (and maybe above) with a supported python interpreter to run. Read the installation instructions on the django website
The included sqlite database contains a few (silly) demo data records and a demo user (username: demo, password: demo. Change this before deploying your app!).
Also don't forget to change the SECRET_KEY variable in generic/settings.py!
Enjoy!
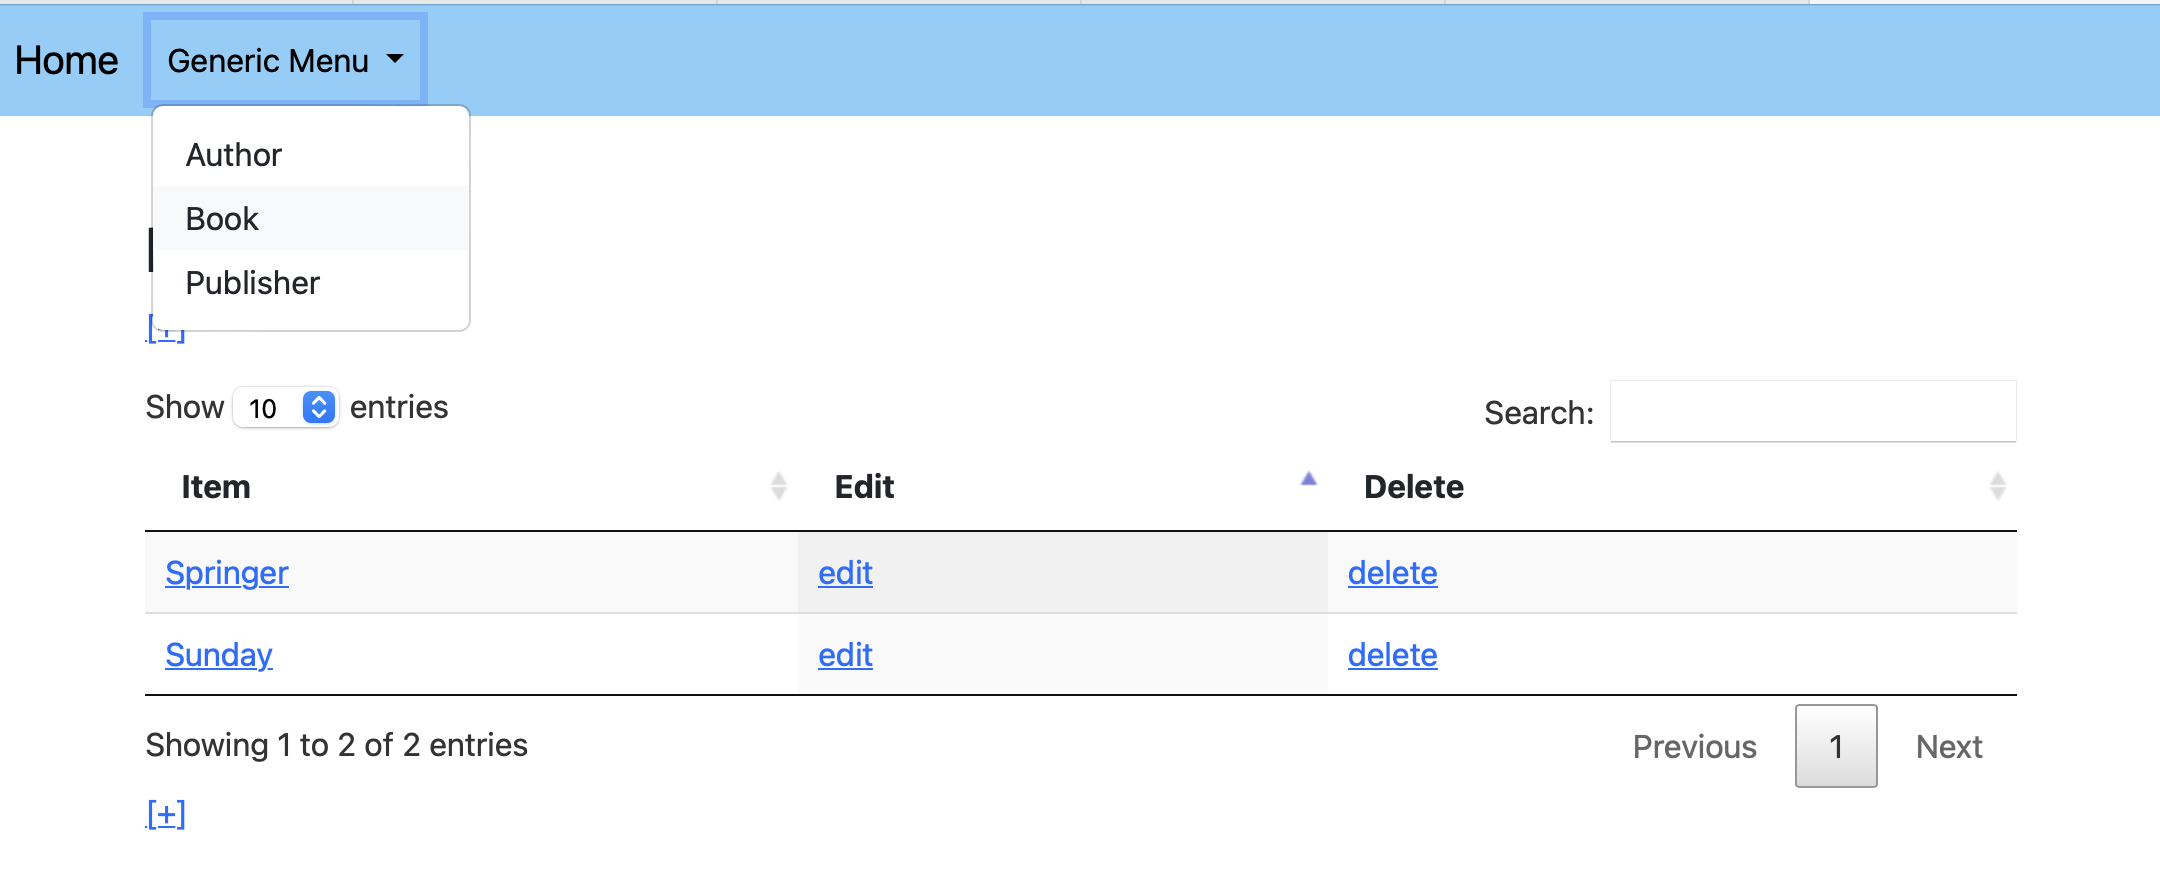
Image: Shutterstock (mixed authors)