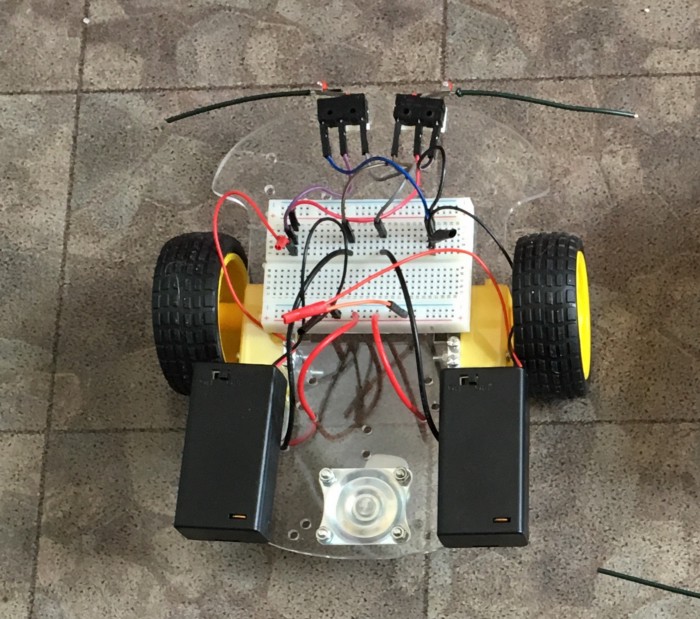
I have a friend who works as a primary school teacher. Together we have developed a very simple robot which can be used to teach the basic concepts of robotics to kids in primary schools (age 9–11). The basic idea for the robot is not new, I have ordered a kit for a similar robot before from a Chinese online shop. It’s a very simple electromechanical robot car which uses two micro switches as collision sensors. The car has three wheels (two connected to electric gear „TT“ motors). We attach pieces of solid wire to the micro switches to make them interrupt or reverse the motor current if the robot collides with an object:
We changed the following things compared to the original design from the online shop:
- We added a half sized breadboard to allow the children to try out different circuits to control the robot
- We added two battery packs (3V each using 2x AA batteries) with ON/OFF switches
The car is controlled using very basic circuits (and not a programmable microprocessor). The robot is ideal to teach basic robotics after an introduction to basic circuits (e.g. using batteries, switches, bulbs etc.). The children learn what the basic „ingredients“ of robotics are (sensors, actors, control unit) and can apply their new knowledge about circuits in a creative way.
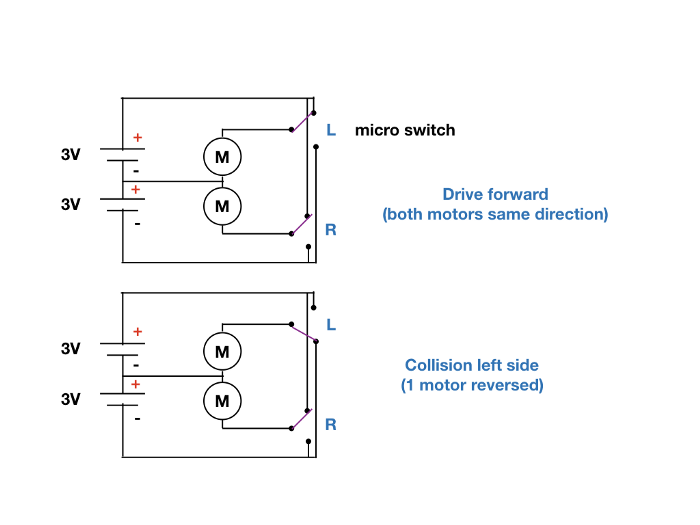
The control unit can be wired in many different ways:
- Connect each motor to a battery pack independently. Goal: make the robot drive forward.
- Add the micro switches to the circuit: basic collision detection (if a micro switch is pressed, one wheel stops).
- This can be done in two ways and the kids will figure out, that the collision avoiding skill of the robot is much better when the motor opposite to the pressed micro switch is stopped.
- They can implement a circuit where the micro switch makes a wheel turn backwards (again two options possible).
A lesson with this kind of robot is also a very good preparation for a lesson with a „real“ programmable robot (like Sphero, Thymio etc.). The kids experience the difference between hard wired electronics and a programmable robot.
Some practical tips:
- We had one robot for two children +It is important to use battery packs with switches. This helps to protect the batteries from short circuits. The kids should be told to switch off the batteries immediately if the robot does not work as expected.
- The chassis for the three wheeled robot (including motors, wheels etc.) can be ordered from Chinese online shops. There are many varieties, most should work well.
- Total cost for the robot (parts) is around USD 15.-. It takes about half an hour to assemble a robot.
- To connect the micro switches to the breadboard, we simply connected female to male breadboard jumper cables to the micro switches.
Images © author